Pages

Thursday, September 27, 2012

Insane

Vintage Insane Asylums always give me the creeps. 
 
Those giant foreboding buildings...Were there really that many insane people that we needed such large institutions? 
And what up with those freakazoid lobotomy's???


 Danvers State Insane Asylum


Hell on Earth
 
 
Brentwood
 
 
Ohio State Institution 1946
 
Making a Straight Jacket for my new Art Doll.


Visiting with the Insane for a while.

My new work in progress.


Tuesday, September 25, 2012

Custom Fabric 2

I have been working on my design the last 2 days for custom fabric to be printed at Spoonflower
 
I figured if I vectored my original art work (Art Dolls) (see my last 2 posts) I would then have it printed on fabric and sew them up for plush Christmas Tree ornaments. 
 
I suggest for anyone wanting to try this out that you start with a mock up of it first!!!
 
I printed this first design onto a crappy iron-on transfer.  Because this was a trial of the design, I didn't freak out when all of the ink started flaking off when I turned the fabric.  ;0)
 
I am so glad I tried this first before ordering it.
 
Notice how I have a front and back to my art doll.  Well forget about lining them up.  I guess if your a master of sewing you could do it but me, no way!
 
My first design and design blunders
 
 
First mistake:  Back and front of art doll.  No way could I ever match up the seams.
 
Second mistake:  The feet are too close together.  That's a no no
 
Third mistake:  Background color
 
Fourth mistake:  Neck is too stubby
 

This is the final design I uploaded tonight.  Got rid of the back of the doll.  Fixed the neck and made the feet further apart and lastly made the background black because that's the color of the fabric I intend to use for the back of the doll.  This way you won't have to worry about the seams as much. 

 
Here's a screen shot of my order and of how many ornaments will fit on 1 yard of fabric.  After my order was complete, with shipping it came out to 18.75 for the yard of custom printed fabric.  They informed that it would be shipped to me in 7 days.  Can't wait!


Day of the Dead Plushie Fabric

First one done.  My Day of the Dead Doll vectored and ready for the printers.  I'm going to try out plush Jeepers Kreepers hanging ornaments.  Fingers are crossed that it comes out good print wise.  takes about 2 weeks to get back from Spoonflower fabric printers. 


Monday, September 24, 2012

Quick & Dirty Photoshop Vector Tutorial

I want to start by saying that this is not a great tutorial but will give you basic understanding of how to get started vectoring.  There are really good in depth tutorials online. 
And with anything, practice makes perfect.
  1. You want to start out with a pretty large template to vector on.  Hit file    new and the size box opens.  3000 x 4000 pixels at least.  You can resize it later to fit whatever template you are using for your project.
 
 
For every shape we vector, we will click the new layer button.
 
Take note that these are the pen tool settings you want selected upper left hand side of tool bar.


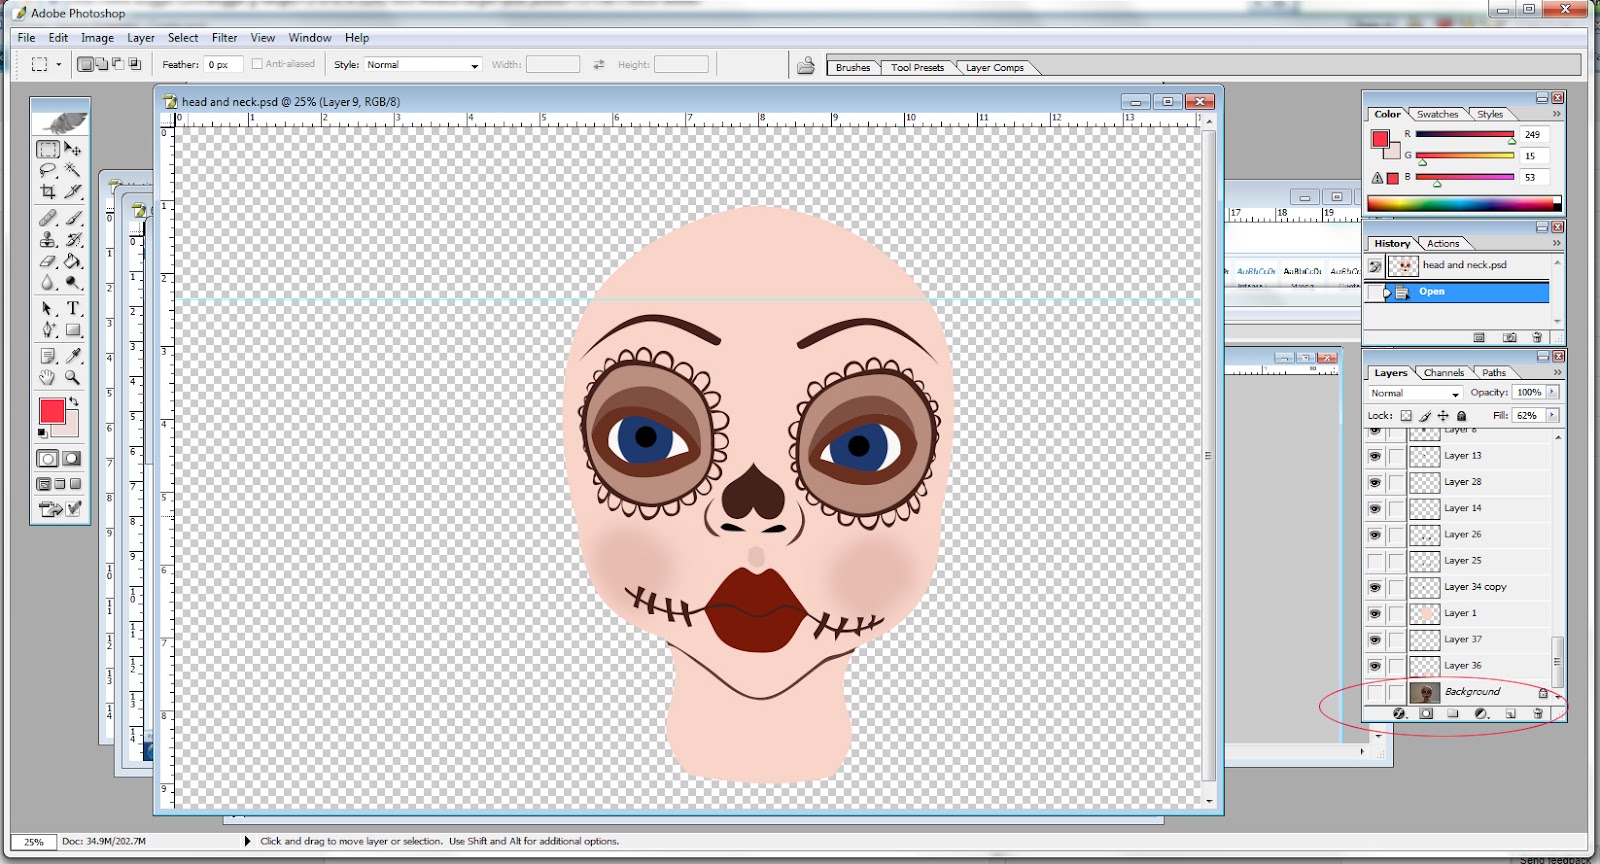
Now your going to start tracing around the largest backround shape of your picture.  In this case it's the face


Once you finished tracing the shape of the face you right click and hit fill path on the pop up box.
Take a look at your color choice to the left. The selected color is going to be your fill color so make your color choice before right clicking and hitting fill path.
 
 
Your path has been filled now right click and hit delete path and you now have your first vectored shape.
 

 Click on the eye next to the layer your face shape is on (right side of screen) to hide it so you can trace the next shape.
next pick the next largest backround shape to vector.  In this case it's the large circle around the eye. 
 
Again I want to stress that you must hit new layer button to the right.  Using the pen tool trace around the shape.  Following same steps as above. 
 
 
You now have your second shape vectored.
Now continue vectoring all of your shapes. Eventually and a while later you will have a complete picture that prints beautifully.


When you are done you want to turn off your photo layer and save a PNG. ( see red circled left hand side of screen)
Complete vector.
 
I hope this helped a bit.  There all sorts of tricks and tips all over the Internet.

Sunday, September 23, 2012

Creating custom fabric

I came across this site the other day that got me thinking.  It's called Spoonflower and you upload your own designs to their site and they custom print them on fabric for approximately 15.00 a yard.  I thought this would be a great idea to make plushie Christmas ornaments or dolls.  How cool is it to be able to  design new work or use designs that you have already created and have them printed on fabric so you can easily sew and stuff them and either sell cheaper or give away to fans, family and friends who can't swing the price of the one of kind original art work.  Just a thought.  I vectored one of my original dolls earlier tonight to see how it would come out and I think it's coming out pretty good.  I still have to do the body and tweak the face a bit but you get the idea.

Here's the link to Spoonflower


This is the original sculpt.
 

Little Red Riding Hood


For my Niece's Birthday this year I decided to make her a Little Red Riding Hood Doll.   I also wanted to make a Big Bad Wolf but having a time crunch I couldn't pull off a complete doll, so I sculpted just the head and mounted it on a decorated dowel.  I love it.  Wish I would have had time to do the Grandmother and Huntsman. 


 I bought her a copy of this book as well.  I hand painted the fabric to match the book before sewing the dress.  If you use watered down acrylic paint it won't make the fabric too stiff.  It really worked out quite well.


Red's cape came out so cute, I used a pattern from Summerfaire's Blog.  I resized the pattern in photoshop. 
 
Story Stix
 
I see a lot of these in the future. 


Here she is with her new doll.
 
I think her Mom liked it more than my niece did!!!


Thursday, September 20, 2012

Big Bad Wolf

For my Niece's Birthday. I bought her a copy of Little Red Riding Hood, retold and illustrated by Trina Schart Hyman. I am also making a Red Riding Hood Doll for her. I hand painted all of the fabric for her dress to match the dress in the book. She's coming out soooo cute. I am also making Story Stix to go with them as well. My Big Bad Wolf Story Stix is done so I thought I would share with you guy's.


Thursday, September 13, 2012

Automata

A little bit of Folk Art, a pinch of Automata,
a sprinkle of Halloween and a Dash of Dark. 

au·tom·a·ton


  A mechanical figure or contrivance constructed to act as if its own motive power; robot.


It's said that clock makers years ago started creating automatons to show off their skills.
 
Over a year ago I had come across 2 Automaton toys at a sale.  They are made by the company Timberkits  http://www.timberkits.com/Home/   I grabbed them cause, hey, you never know. 
 
Well in my quest for ideas for Halloween art, I went to my trusty closet in my art studio where I keep all of the garage sale and flea market scores that I just know I will use at some point in the future (;0) and there they were.  Had to give it a try and to my amazement was able to pull this off. 


Here's a quick video to show it in motion.
 

Thursday, September 6, 2012

Teacup piggy

So, I was bored and a bit uninspired today.  Trying to come up with some Halloween concepts and sooo I end up with this little gal instead.